Menu
Index

Settings & Options Window

Settings & Options Window
1

Info dropdown

1. Info dropdown     Clicking this button will show a dropdown menu of Help options. See Help menu dropdown for details.
 
2

Help - Controls

2. Help - Controls     
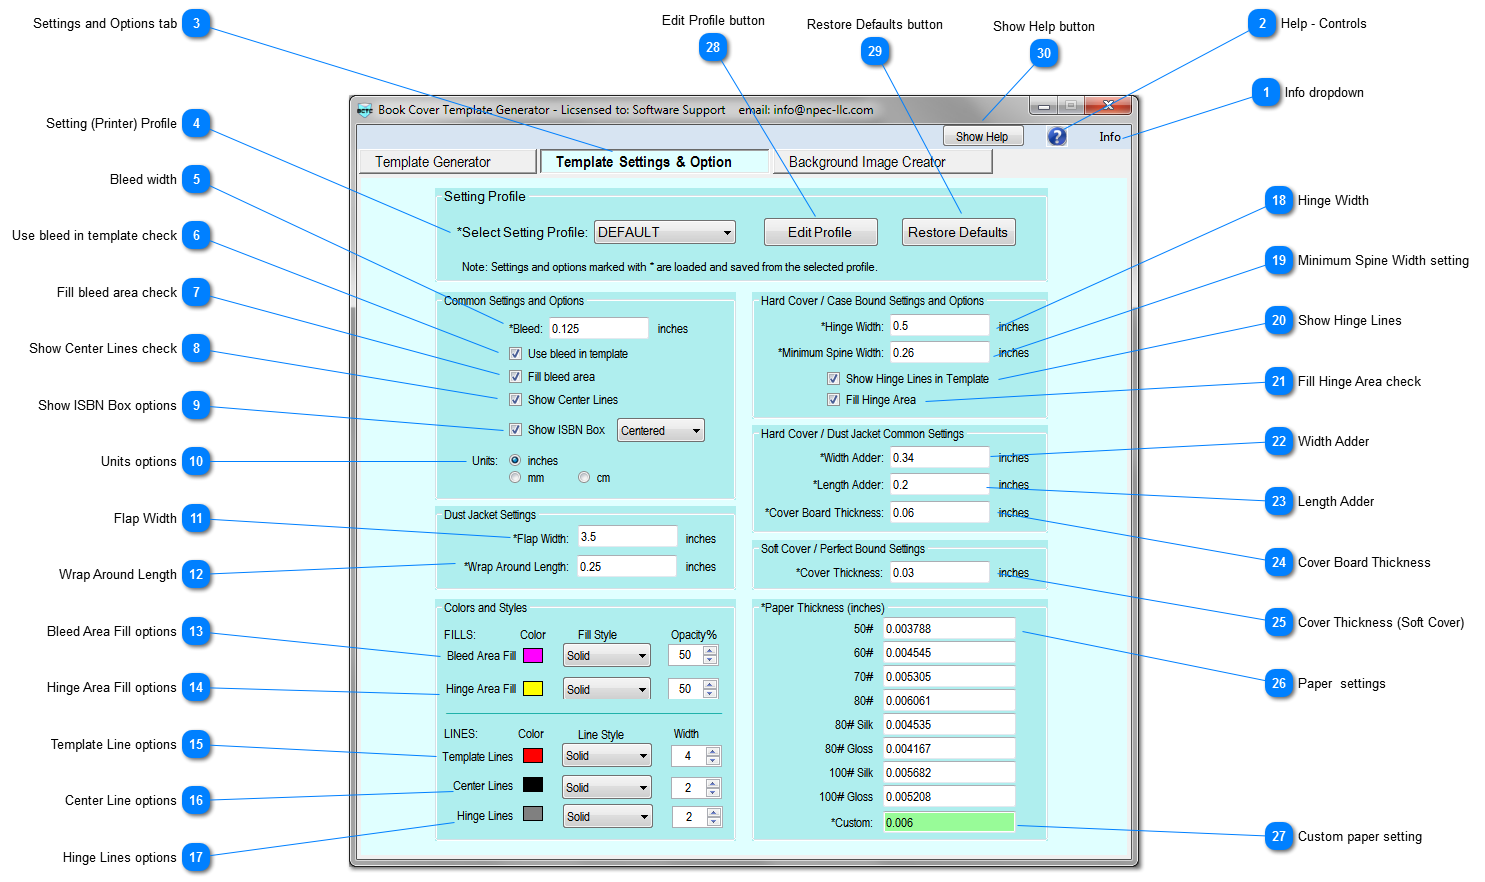
Clicking this button will add a "?" [    ] to the cursor, then, the next control clicked will display an information box about that control. To remove the information box, click anywhere.
 
3

Settings and Options tab

3. Settings and Options tab     Click the "Settings and Options" tab, to open the settings and options window.
 
4

Setting (Printer) Profile

4. Setting (Printer) Profile
Use the drop down to select the book printer profile to use for calculating and generating templates or profile to be edited. (Setting Profile group box)
5

Bleed width

5. Bleed width    
Value sets the amount of Bleed around the border of the book cover or dust jacket. (Common Settings and Options group box)
 
6

Use bleed in template check

6. Use bleed in template check    
When checked, the set Bleed amount will be added to the border of the template dimensions.
 
7

Fill bleed area check

7. Fill bleed area check    
When checked, the bleed area will be filled  with the color and style set in the Colors and Styles section. (Common Settings and Options group box)
 
8

Show Center Lines check

8. Show Center Lines check    
When checked, will show the center line of the spine and center lines for the book covers. (Common Settings and Options group box)
 
9

Show ISBN Box options

9. Show ISBN Box options    
When checked, will add a box on the template to locate your ISBN image. The dropdown selects the position of the ISBN box. (Common Settings and Options group box)
 
10

Units options

10. Units options     Select the units to use throughout the software, options are inches, millimeters (mm)  and centimeters {cm). (Common Settings and Options group box)
 
11

Flap Width

11. Flap Width
Value sets the flap width of the dust jacket. (Dust Cover Settings group box)
12

Wrap Around Length

12. Wrap Around Length
Value sets the length to add to a dust jacket to allow for the jacket to wrap around the cover. (Dust Cover Settings group box)
13

Bleed Area Fill options

13. Bleed Area Fill options    
Bleed fill options, click box to change color, the dropdown selects the fill style and the numeric up/down value sets the opacity of the fill. (Colors and Styles group box)
 
14

Hinge Area Fill options

14. Hinge Area Fill options    
Hinge fill options, click box to change color, the dropdown selects the fill style and the numeric up/down value sets the opacity of the fill. (Colors and Styles group box)
 
15

Template Line options

15. Template Line options    
Template line options, click box to change color, the dropdown selects the line style and the numeric up/down value sets the width of the line. (Colors and Styles group box)
 
16

Center Line options

16.  Center Line options    
Center line options, click box to change color, the dropdown selects the line style and the numeric up/down value sets the width of the line. (Colors and Styles group box)
 
17

Hinge Lines options

17. Hinge Lines options    
Hinge line options, click box to change color, the dropdown selects the line style and the numeric up/down value sets the width of the line. (Colors and Styles group box)
 
18

Hinge Width

18. Hinge Width    
Value sets the distance from spine where text should not be placed. (Hard/Cover / Case Bound Settings and Options group box)
 
19

Minimum Spine Width setting

19. Minimum Spine Width setting    
Value sets the minimum allowable spine width. (Hard/Cover / Case Bound Settings and Options group box)
 
20

Show Hinge Lines

20. Show Hinge Lines    
When checked, will display hinge lines in template. (Hard/Cover / Case Bound Settings and Options group box)
 
21

Fill Hinge Area check

21. Fill Hinge Area check    
When checked, will fill hinge area with color and style set in Color and Styles section. (Hard/Cover / Case Bound Settings and Options group box)
 
22

Width Adder

22. Width Adder    
Value sets the amount that should be added to the page width for the book cover. (Hard Cover / Dust Jacket Common Settings group box)
 
23

Length Adder

23. Length Adder    
Value sets the amount that should be added to the page length for the book cover. (Hard Cover / Dust Jacket Common Settings group box)
 
24

Cover Board Thickness

24. Cover Board Thickness
Value sets the thickness of the cover board used in the book. (Hard Cover / Dust Jacket Common Settings group box)
25

Cover Thickness (Soft Cover)

25. Cover Thickness (Soft Cover)
Value sets the thickness of the book cover. (Soft Cover / Perfect Bound Settings group box)
26

Paper  settings

26. Paper  settings    
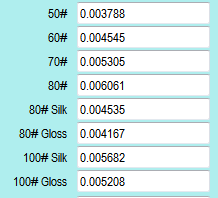
Values set the paper thicknesses. Settings and names can be edited for a Printer Profile by clicking the "Edit Profile" button. Note: dimensional units are displayed in the group box title.  (Paper Thickness group box)
 
27

Custom paper setting

27. Custom paper setting    
Enter a custom value for paper thickness to be used when Custom option is selected in Paper Type in the Book Information Section of the Template Generator page. (Paper Thickness group box)
 
28

Edit Profile button

28. Edit Profile button    
Clicking this button will open the "Edit Profile" window.
 
29

Restore Defaults button

29. Restore Defaults button    
Click to restore all settings and option selections to their original state.
 
30

Show Help button

30. Show Help button
Clicking this button will open the Settings and Options Window topic in the Help file.