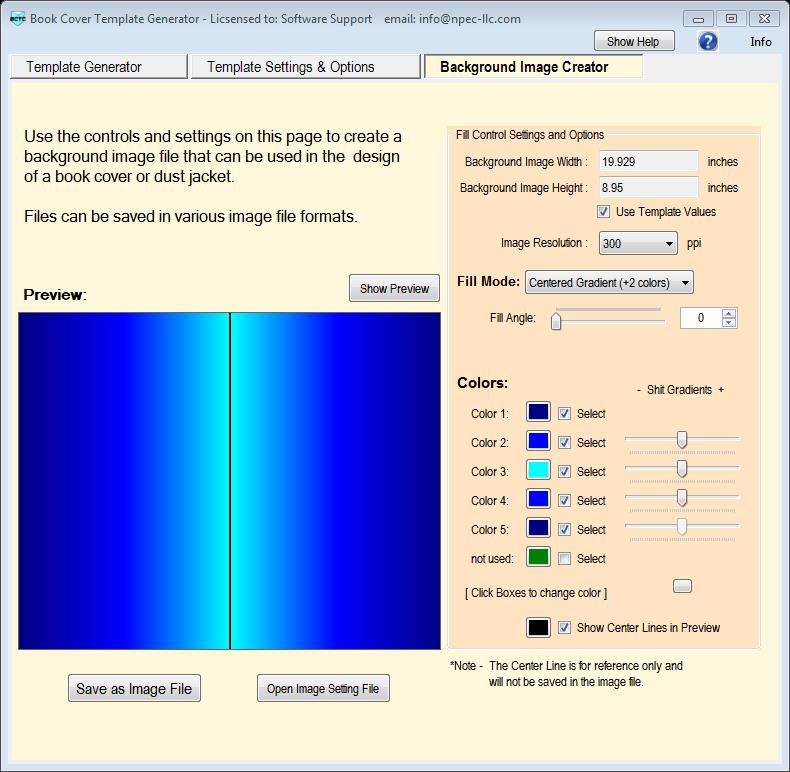
Select the "Background Image Creator" tab. The Background Image Creator window (as shown below) should be opened.
Determine the image size. By default the size will be the same as the calculated template size. You can manually enter your own dimensions for the image size by de-selecting the "Use Template Values" option and then enter values for Width and Height.
Select the desired resolution of the image from the drop down selection. By default 300 ppi (pixels per inch) is selected.
Select a Fill Mode from the drop down selection. (See below for an explanation of options.
Select the number colors you wish to use for your image. Use the check boxes to enable the use of a color and click the color boxes to select the color(s) you wish to use. (See Color Control Options)
Gradient positions and angles (Sized for redial gradients) can be modified using the slider controls.
Click the "Save as Image File" button, a Save File Dialog will appear, you can enter a name for the image, select the image format (Bitmap, JPEG, PNG) and location you wish to save the file.
When you click OK from the Save File Dialog the image file will be saved as well as a Image Setting File (yourfilename.isf). You can open the ISF file by clicking the "Open Image Setting File" button and all settings will be set themselves to the values from the saved image file.
Add the saved image file to a new layer in the application you are using to create your book cover. (See Using Book Cover Templates topic)
Notes:
The default path for saving files is MyDocuments\BookCoverTemplateCrator\Background. You may save your files in any location you wish.
When you select radial gradient patterns the Fill Angle control will change to a Radial Width control and a Radial Height control will also appear.
Checking the "Show Center Line in Preview" option will display a centerline in the preview box aiding in gradient position adjustments. The centerline will not be saved in the image file.
The first and last colors of any fill mode will not have any gradient shift (position) controls as there are the start and end colors.
Whenever a change is made to the settings the preview box will automatically change the image to reflect your changes.
Fill Modes:
Solid - use only one color. Creates an image with a single color.
Single Gradient - use only two colors. Creates an image with a single linear gradient between the two selected colors, no gradient position control. Angle of the gradient may be changed using the Fill Angle slider control.
Centered Gradient - use two or more colors. Creates an image with single to multiple linear gradients. You can shift the gradient positions of the internal colors. Angle of the gradient may be changed using the Fill Angle slider control.
Mirrored Gradient - uses two or more colors. Behaves identical to Centered Gradient (see above) except that the pattern will be mirrored on either half of the image.
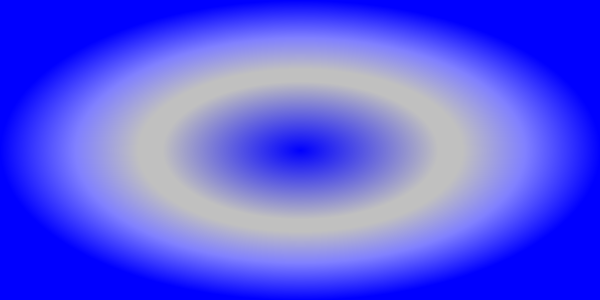
Radial Gradient - uses two or more colors. Creates an image with single to multiple radial gradients. You can shift the gradient positions of the internal colors. Size of the gradient pattern may be changed using the Radial Width and Radial Height slider controls.
Mirrored Radial - uses two or more colors. Behaves identical to Radial Gradient (see above) except that the pattern will be mirrored on either half of the image.